Sunday, August 7, 2011

Nautical Escapes


My husband and I love kayaking. When a LivingSocial coupon popped up for a guided eco-tour of the Intercoastal with Nautical Escapes, we were excited about an afternoon on the water plus the opportunity to learn a little more about our backyard.

The first trip we booked was canceled due to rain (gotta love those Florida afternoon storms). The next week was a go.

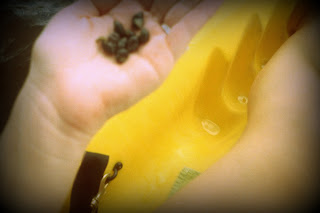
The short 2 hour trip is designed for beginners and our guide, Ed, was eager to help the kids in our group who were having a little trouble. We started at Dutton Island Preserve and once we got out to the Intercoastal, we stopped so Ed could show us some periwinkle snails.

(my cheapo waterproof camera was having focusing issues)
I kind of wanted to keep them, but my hubby was not keen on doing the rest of the paddling himself.

Ed pointed out all the different birds we saw and explained what the different marshy areas and islands are called.


We paddled down to the Atlantic Boulevard bridge where Ed said the dolphins like to feed in the afternoon. Sure enough, they were everywhere! I'm not going to lie, I was pumped.


On the way back, we went through the salt marshes and the thunder we'd been hearing in the distance finally kept its word -- it poured on us. But it actually felt great because it was so hot out! (I just wish I had brought a hat to keep it out of my eyes.)

getting rained on!
It was a fun little trip. Great for beginners or anyone wanting to learn a little more about the critters who call the Intercoastal home!

Sunday, July 17, 2011

Trash to Treasure

In preparation of my husband leaving for deployment in a few short weeks, I've been planning projects. So far, those projects have involved Craigslist, $50, heavy lifting and two hideous pieces of furniture with a lot of potential.

I'm not a fan of the shabby chic thing, so these need a BIG makeover
My husband, who is having trouble visualizing said potential, was aghast when I came home with these pieces. I will admit, in their current condition they are going to stay tucked away in our garage because they are, well, pretty hideous.

So I had to prove to him that with a little creativity, you can turn trash into treasure!


Had I not been so excited, I would have taken before pictures of the items used. Whoops... I'll try to remember that next time. But I found a picture online of a DIY candle holder using old vases and random candlesticks. I grabbed two vases that were collecting dust in our cabinet and Wal-Mart provided me with two candlesticks, two candles and split peas (how great is that idea?!?!) A little glue later and voila! They cost me less than $10 to make.

And hubby did not think these were hideous. Hopefully this has increased his faith in my upcoming decorating endeavors?

Sunday, July 10, 2011

Cake Pop Project

Earlier this week, while looking for creative projects on the web, I stumbled onto this image.

Oh stop it. Really? Those are awesome!

However, other than the easily-recognizable chocolate chips, I had no idea what they were or how to even begin making them.

Google provided me with the following information:

They are cake pops. You mix icing and cake together and roll them into balls, put a stick in them and dip them into candy coating.

Sold.

I worked at a bakery in college and loved when a customer came in with a challenge like that. I figured out cupcake cakes (cupcakes arranged and then iced over in the design of a dinosaur or a bike or whatever) way before they started appearing in Martha Stewart, and my absolute favorite thing was making wedding cakes.


Which, by the way, made for a hilarious story at our wedding, when the cake decorator at Cinotti's Bakery got confused (after letting her know I used to do wedding cakes and the multiple meetings, pictures, sketches, phone calls and email reminders).

picture I gave them vs what showed up at the reception
So when I walked into the wedding reception and saw a BLUE cake, I almost fainted. And then I almost died laughing. I mean, really, at that point, what else do you do? (Yeah, everything at Cinotti's is delicious, but don't use them for your wedding cake.)

Okay, back to cake pops. So I figured, how hard could they be?

A few trips to the grocery store and Michaels later, project get-cake-all-over-the-kitchen was in full swing.

Step 1 -- Bake cakes, then crumble into bowl. (I also added red food coloring to the white cake mix.)


Step 2 -- For each box of cake mix you used, mix in 12 oz frosting. (Again, added the red food coloring prior to mixing.) I also added mini chocolate chips to the mixture to look like seeds!


Step 3 -- Roll out the balls.


It's entirely possible I was so excited about this that I did it at 1 a.m. after I got home from work. Haylie was keeping me company (and cleaning whatever I dropped on the floor -- good dog!).  

Step 4 -- Dip them in the coating. Put in the sticks.

This is where I started to have some trouble. If you just put the stick in and try to dip them, they fall off the stick. After staring at them for a while, in my now-2-a.m. daze, I realized the chocolate will also work as a glue. I dipped the end of each stick in the chocolate, stuck them in the balls and then put the tray in the fridge overnight to set up. It worked!


Step 5 -- Now dip them in the coating! Melt the chocolate according to directions. After burning a lot of chocolate in my bakery days, I now use this method: microwave 30 seconds, stir 15 seconds, microwave 30 seconds, stir 15 seconds, microwave 15 seconds, repeat, using 15 second intervals until melted.


Step 6 -- Let cool. I used a piece of styrofoam and it worked great!


Step 7 -- Dip again, this time in green candy coating. I found the green, pre-dyed candy coating I got from Michaels to be much easier to dip and significantly thicker.


Step 8 -- Let cool.

Step 9 -- Eat!!!


Sunday, June 26, 2011

Enchanting Etsy


Could it be? Is it true? Not everyone knows about Etsy???

This post is bigger than Jacksonville, and for good reason -- Etsy is freaking awesome!

Etsy was modeled after craft fairs, like the Riverside Arts Market here in Jacksonville. Except at this craft fair there are hundreds of thousands of vendors.

Literally anything you want, if it can be made, can be found on Etsy.

Anything from handmade beads to clothing to incredible art.


And if you're getting married, it's a great place to find unique invitations, favors, hair pieces or keepsakes. One of my friends from college recently got married and had her dress on a personalized hanger. SUCH a cute idea -- I'm so jealous I didn't have one for our wedding!


Links for the above listings (in case you're interested and so I don't get sued):

Friday, June 24, 2011

She Glues Sea Shells

It's entirely possible there's nothing I love more than finding expensive art and then making it myself. While I'm not going to be copying any Van Goghs anytime soon, on most stuff I can come pretty close.

This project started around Christmas last year, as I was perusing Etsy for a non-fake-flower door wreath. (I've just got this thing about fake flowers.) While I was looking through a variety of white berry wreaths, I came across this one.


Ok, I'm not really a huge fan of beach decor. I think to theme an entire room with jars of sand, flip flops on the wall as art and nautical print all over belongs, if anywhere, only in a vacation condo. And only if it's actually on the beach. It doesn't count if it's in Nebraska somewhere.

But come on. That wreath is gorgeous! I was hooked (get it?). I was set to snatch it up... when I looked at the price tag.

$98.

Are you kidding me?!

So several months later, using the natural (read: free) resources located in my backyard, I set out to make my own!

Here's how I made the $98 wreath for a quarter of the price.

You'll need a high temp glue gun, a package of glue sticks, around 100 shells, a straw wreath and ribbon or twine.

For two weeks, I went to the beach every other day picking up as many shells as I could find. I stuck with mostly light-colored ones just because our door is a darker color. Something I learned as I was making the first wreath is that the shells don't need to be perfect. You're going to be layering them, so all shapes and sizes work and it's easy to hide the flaws.

The Jacksonville beaches don't have a lot of the exotic shells, so I picked up a bag of random shells (including those large spiral showpiece shells) from Hobby Lobby for $7 and a bag of small spiral shells for $5. I also bought the starfish from Hobby Lobby for about $5. The straw wreath was $4 and the twine was $3. I already had the glue gun and glue sticks, but to buy those will run you about $10. 

Pick a starting point and start gluing!

Work your way around the wreath, fitting in shells. It's kind of like a puzzle. At the top, I layered the shells so they made a bridge over the ribbon, so if it moves or I want to tie a different ribbon there eventually, they aren't actually glued to it.

I used most of the beach-found shells for the bottom layer, and used the prettier spiral shells to create depth on top.

The finished product was a huge hit. I've already made another one for our sweet neighbors and have requests lined up for when I have time to make more.

This would be a great project to do with kids, letting them pick out which shells to use next, as long as you're doing the gluing!

the finished wreath!

See the Sea Creatures

While the beaches of my last stop (Panama City) are much prettier than the Atlantic beaches (sorry... but it's true...), the beaches here have WAY more shells, which are coming in handy for some projects I've been working on (post coming soon!). And our dog, Haylie, is happy because it means more walks to the beach for shell collecting.

On my last few visits, I've encountered more sea creatures than I've seen in the past year! Perhaps it's the time of year? Whatever the reason, I'm letting my inner nerd out and doing a little research on the critters in my backyard.

This Netted Olive Sea Snail started it all!


The meeting went something like this:
Me (to no one in particular): "Oooh what a pretty shell!"
I try to pick up the pretty shell.
Pretty shell fights back.
Me: "AHH!"

I then of course hunkered down and picked him up despite his protests. I couldn't get a good picture of him out of the shell (holding the squirmy little guy and the camera at the same time didn't go very well) but the picture on the bottom I found on one of my new favorite websites, the O'Keefe Family Website. The family includes a biologist and photographer and documents tons of animals, marine life and shells in North Carolina. Lucky for me, we have a lot of the same critters!

Next, I found (read: almost stepped on) this guy.


Thanks to my sister-in-law (studying to be a vet), I now know this is a Cannonball Jellyfish.

Had I stepped on him, it would have been pretty gross (ew) but they're harmless to humans.

These, on the other hand, are not harmless.


The yucky picture on the left is the one I found. This one had obviously been there a few days though because the beautiful colors had faded, so I had to add some pictures that do it better justice (dear owner of pictures: please don't sue me).

I didn't need any help quickly identifying this as a Portuguese Man-of-War. What I didn't know was that while they're commonly called jellyfish, they're actually not! Instead, they're actually siphonophores. What!? It's actually a colony of creatures including the Man-of-War fish that depend on each other for survival.

They carry one of the most toxic marine poisons though. No bueno, but they sure are pretty.

Another cool fact about the Man-of-War is that they live on the surface and are moved by the wind (hence that neat-looking sail).

I'm so geeking out right now.

The next sea creature I happened upon is also not something you want to step on.


I knew he was some type of puffer fish, so after some Googling, I'm pretty confident to identify him as a Northern Puffer. Although the spines would hurt, they aren't actually poisonous. (Yay!)

On to some nicer creatures...

As we were wrapping up one walk, I spotted a WHOLE sand dollar.


Almost perfectly round and a perfectly centered "flower".

Sand dollars are such neat things. What we find on the beach is the exoskeleton which is bleached white by the sun. Those petals are actually five sets of pores that are used to move it through the water. And apparently you can use the rings to tell how old the sand dollar is (they usually live 6-10 years)!

I had never seen this beautiful kind of starfish before.


I almost didn't pick it up because it was so brightly colored and brightly colored animals tend to be poisonous (see Man-of-War...). But I picked it up anyway, lol. It was big, as far as starfish I've seen on our beach go, probably 8 inches from top to bottom and bright purple and orange. I wish I had taken a closer picture now because the orange trim looked like beads.
 
Although these are apparently very common, it took a bit of digging to actually find any information about them. Apparently this is a Astropecten articulatus. Common names include Royal Sea Star and Beaded Sea Star. The arms can grow up to 9 inches long! It was beautiful.

Next post: What I made with all the shells gathered on these beach walks and how you can make one too!
Thursday, June 2, 2011

HomeGoodies

On a recent visit, my mother announced she wanted to go to HomeGoods telling me, "They talk about it all the time on the blogs!"

A) I love that my mom is so hip and following "the blogs"
B) I have no idea to what blogs she's referring
C) I was a little upset I'd never heard of/been to this "amazing home store"

We found a HomeGoods (actually, we found two during our day of shopping, one on Jax Beach and one near The Avenues) and began the shopping excursion.

I do a lot of discount home shopping and I was in heaven here. Stores like Ross or Garden Ridge have good deals, but you have to weed through dented/broken/junky stuff. Everything in HomeGoods was super cute and in good condition!

I spotted these amazing serving dishes. LOVE LOVE LOVE the bright colors!

But... I couldn't rationalize any reason I needed them so I just helped Mom carry out all of her purchases.

This past weekend, DH and I decided to have a few friends over. At first I swore I wouldn't be doing any decorating. Then I thought about those serving plates I had been eyeing. 

Text message to DH: "Um, I had an accident."
DH: "What happened?!"
Me: "I accidentally bought some serving dishes..."
DH: "Sigh."

They are a sturdy ceramic and microwave and dishwasher safe - score! I left with a few serving plates (~$5 each), a condiments tray (~$8), a few bowls (~$4 each) and a huge orange platter I found in the clearance section ($7).

Finished up the festive look with limes in a few brightly colored glasses and some flowers I grabbed in Winn-Dixie ($6) in a vase I already had!